
Creating a New Blog Post
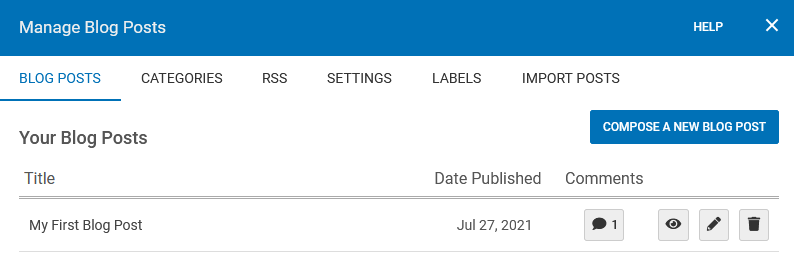
Each SiteBlocks website comes with a built-in blog feature. To create a new blog post, you will want to access the "Manage Blog Posts" section by clicking "POSTS" and then "Blog Posts" in Blog Element the Toolbar. Then, simply click the "Compose A New Blog Post" button to get started.
You can also create new posts directly from your blog post element by clicking "New Post" on the Blog Post's Toolbar if the element has already been added to a page.
If you are editing a post, it will already be published, however, new posts will be able to be saved as a draft for later editing and posting in the Manage Blog Posts area. This will be verified in the "Manage Posts" area.
Initial Setup
If this Blog has not been added to your website as an element yet, you will need to make sure you add it to your website to ensure the posts are visible to your visitors. To add your Blog as an element, simply click the "ELEMENTS" button on the main toolbar and drag and drop a "Blog Posts" element to your page.
If you would like to choose a preset layout, you can browse these and more by clicking the "Layout/Settings" menu option located on the top left of your Blog Posts element on your page. Preset Layouts are great for creating a blog post with appealing formats.
Edit Blog Posts
The post title can be changed by editing the blog post.
You can control the post details for the blog entry under Blog Post Options by editing the blog post. The Date Published time and date can be modified simply in the Blog Post Options area so you can have the proper setting when the entry is ready to be published.
The AutoSave Every Minute option allows you to use our auto-save feature, allowing you to be sure your content won't be lost should there be an issue during editing.
Blog Post Options
You can access the Blog Post Options tab by editing a post to access the Edit Blog Post area.
The Custom Permalink field will allow you to enter a permalink into a text box that will be added to the Blog Post Title once published live.
The post Category can be changed here as well. If you would like to add this to a new category, you can create one by clicking the 'New Category' link. Clicking on the Announce To check boxes will allow you to automatically announce your post to Facebook and Twitter. This is only available when creating a new blog post.
The Published date and time can be modified in this area as well so you can have the proper setting for when the entry is ready to be published.
Comments can be enabled or disabled here via the Allow Comments check box. This will be enabled by default but can be disabled here later if necessary. These can be managed at any time in the "Visitor Comments" area of the "POSTS" section of the Toolbar.
Adding a 'Read More' link
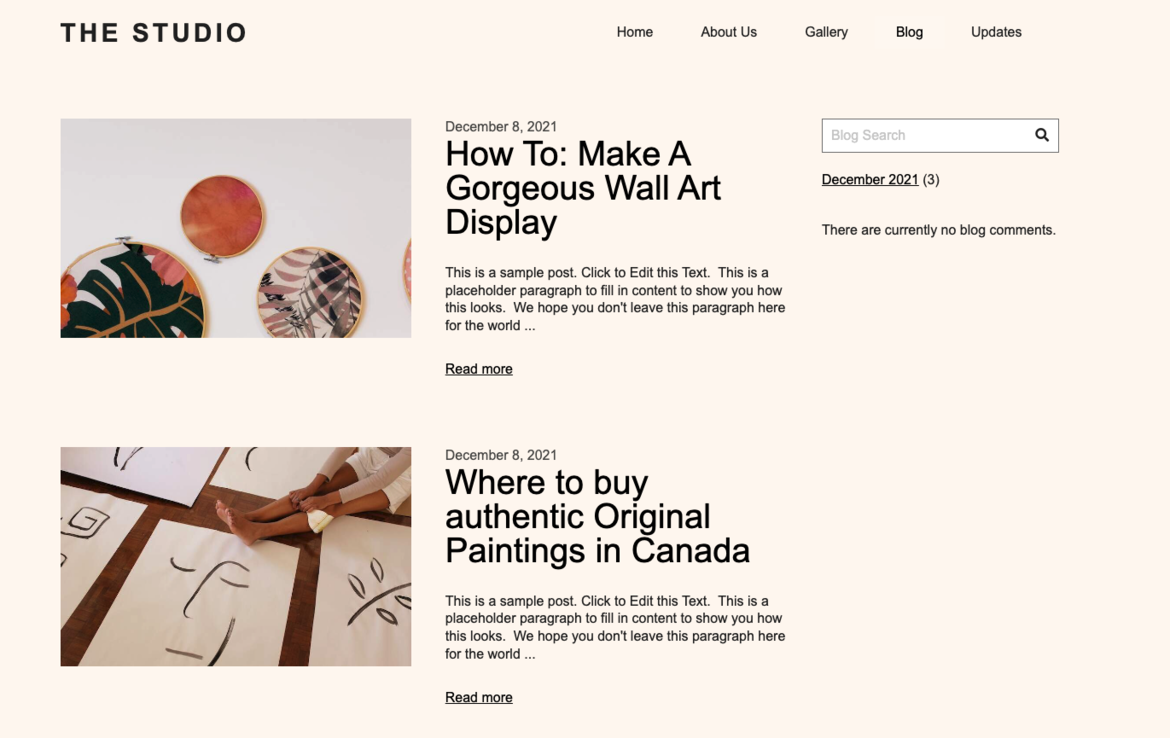
You can insert a 'Read More' into the body of your blog post to separate your post content between what displays on your website, and the rest of the content (including the pre-read more content!) which will display on the page dedicated for all post content.
So what does this mean and why would you want to do this? This is most commonly used to keep neat and tidy the page where the blog posts are appearing - using just a portion of the full post - serving as a "preview" of your post, with a way for readers to click on a link if they are interested in reading the rest of the post.
To add one, click on an area in the body of your post where you want to insert it, and click the "Read More" button
 . A dotted line will appear in your blog post when editing to indicate where the read-more will begin.