
Adding A Navigation Bar
To add navigation to your website, you can drag a "Primary Navigation Bar" in from the elements list, or you can drag in a pre-designed Header Block, from the left side menu, where you can just edit the navigation to match your website.
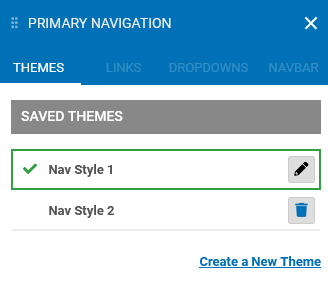
Creating New Navigation Themes
To create a custom theme for your navigation, hover over the main navigation on your website until the orange dropdown appears. Select "Swap/Edit Theme" which will bring up the primary navigation menu. From here you can create a new theme, or edit the current one. Select "Create A New Theme", here you can edit fonts, colors, hovers, etc.
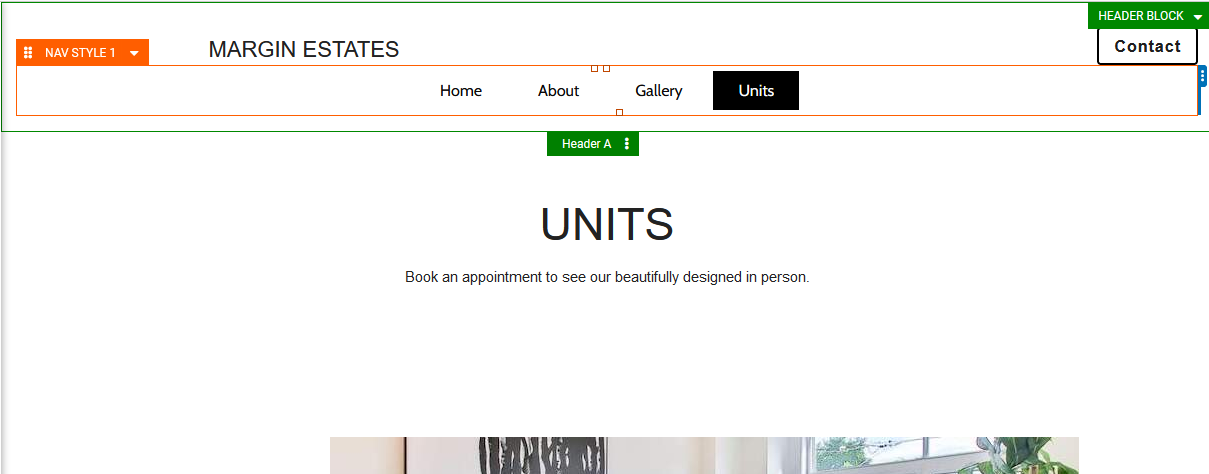
Using Multiple Navigations For Your Website
If you want to have a different style of navigation on your Home page versus the rest of your website, create a new navigation theme under the Primary Navigation Menu. Once you have multiple navigation styles created, go to the page you want your second navigation style, hover over the header, and click on the green "Header A" tab.
From here you create a new Header B. Go back to the Primary Navigation Window, and select the new Primary Navigation you just created. From here you can customize your Header B, which will not affect Header Style A.
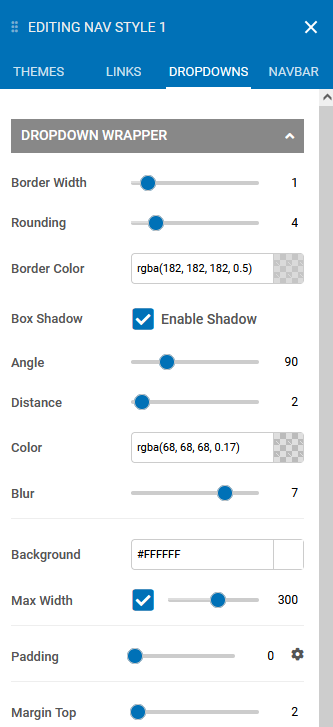
How To Customize Drop-Downs
To create a drop-down on your primary navigation, go to Swap/Edit Theme from the Element's Toolbar, create a new navigation theme or edit the current navigation by clicking the pencil icon. Click the "Dropdown" tab and here you will be able to customize the look of your drop-downs.
How To Add Site Pages To Navigation Drop-Downs
Create a page that you'd like to be within your navigation drop-down through the left side menu "Pages". Now hover over your main navigation until the orange dropdown menu appears, and select "Edit Menu Items". With your cursor, grab and drag the page you just created so that it sits under the page you want the dropdown to be located. Now grab the new page again and drag it to the right.
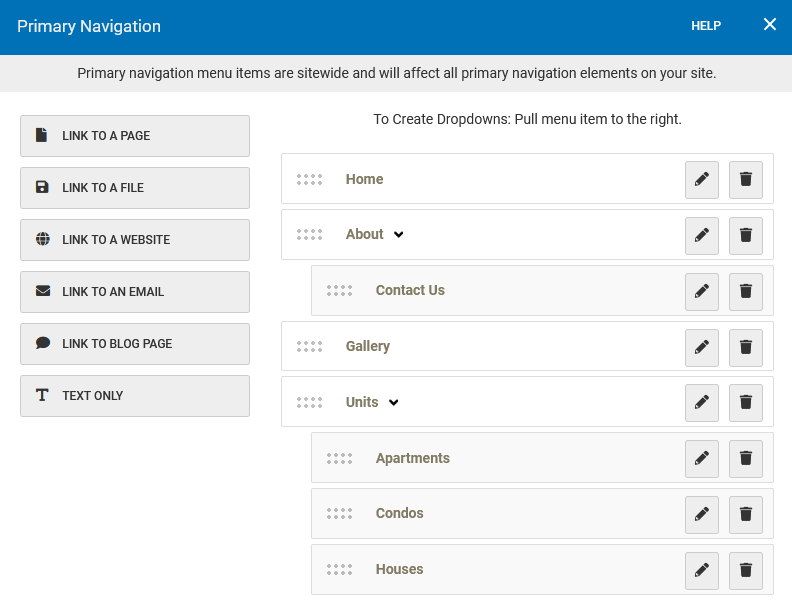
Adding Link Navigation Items
To add a navigation item, click "Edit Menu Items" in the Navigation Bar toolbar to access the Primary Navigation Manager.
Select from one of the following options for creating a navigation item in the left column:

Link to a page: You can add a navigation link in your navigation bar to any page that already exists on your website. Select the page from the Select A Page dropdown menu. Next, you can customize the navigation item Label under the Label field (this is what will appear on your navigation bar).
Link to a file: You can link to files that you have uploaded to your Photos and Media Manager (including Word documents, pictures, PDFs, etc.). Click "Browse Uploaded Files" to open the Photos and Media Manager to select a file you would like to link. Select the file and click the "Use Selected File" button in the bottom right corner to choose the file. You can check the "Open file in a new window" checkbox if you don't want your visitors to leave the current page when clicking the file, alternatively, this will open in a new tab.
Link to a website: You can add a navigation link in your navigation bar to an external website. Paste the entire website URL (for example: http://websitename.com) into the Website URL field. Next, you can customize the navigation item Label under the Label field (this is what will appear on your navigation bar).
Link to an email: You can prompt your visitors to open a new email message that is addressed to your email. Fill in a valid email address in the Email Address field. Next, you can customize the navigation item Label under the Label field (this is what will appear on your navigation bar).
Link to a blog page: You can add a navigation link in your navigation bar to your blog page. Type in your blog page path name (this is usually "blog") or type in a new path name to create a new page containing a blog element. Next, you can customize the navigation item Label under the Label field (this is what will appear on your navigation bar).
Text only: Add a text-only navigation item is a great way to add context and organization to your navigation bar. Use this to create labels and titles for your navigation links.
Editing Navigation Items
To edit a navigation item, click "Edit Menu Items" in the Navigation Bar toolbar to access the Primary Navigation Manager. Click the pencil icon to edit the Navigation Item, from here you can edit the label and navigation link.
Navigation Link Styles
To create a custom style for your navigation bar links, hover over the main navigation on your website until the orange dropdown appears. Select "Swap/Edit Theme" which will bring up the primary navigation menu. From here you can select the Links tab.
Link Style: Style your links by selecting a font (including the family, size, color, and style) of your choice. You can also set a custom background and adjust the padding and margin surrounding your links.
Link Hover: When a visitor hovers their mouse pointer over your Navigation item, make the item pop by changing the link style. You can change the font or background color, while will add some interactivity to the navigation bar.
Link Active: If your visitor is at a location on your website that is indexed by your navigation bar, you can indicate this by changing the style of the currently active Navigation link. You can change the font or background color, while will add some interactivity to the navigation bar.