
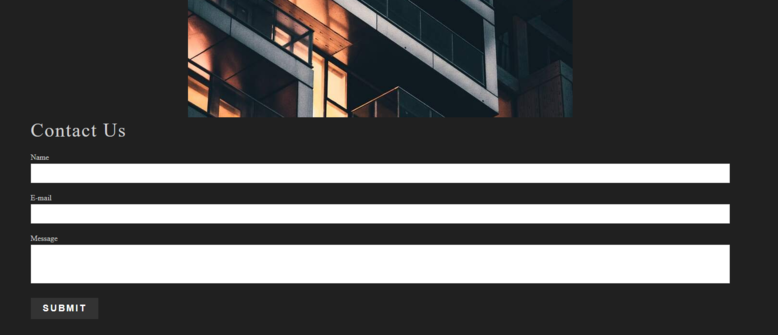
Tip: A contact form is a smart option for keeping your contact information secure. Instead of advertising your email address or phone number on your website that potential spammers could use, add a contact form to conceal this information and have your contact form entries go straight to an email address of your choice.
Where to Find
This element can be found in the "Add Content to Page" section of the Toolbar.
Adding to Website
After selecting this element, you will be able to choose exactly where you want to add it! Simply drag the Element onto the purple, orange or blue ribbons on your page.
Setting up your Contact Form
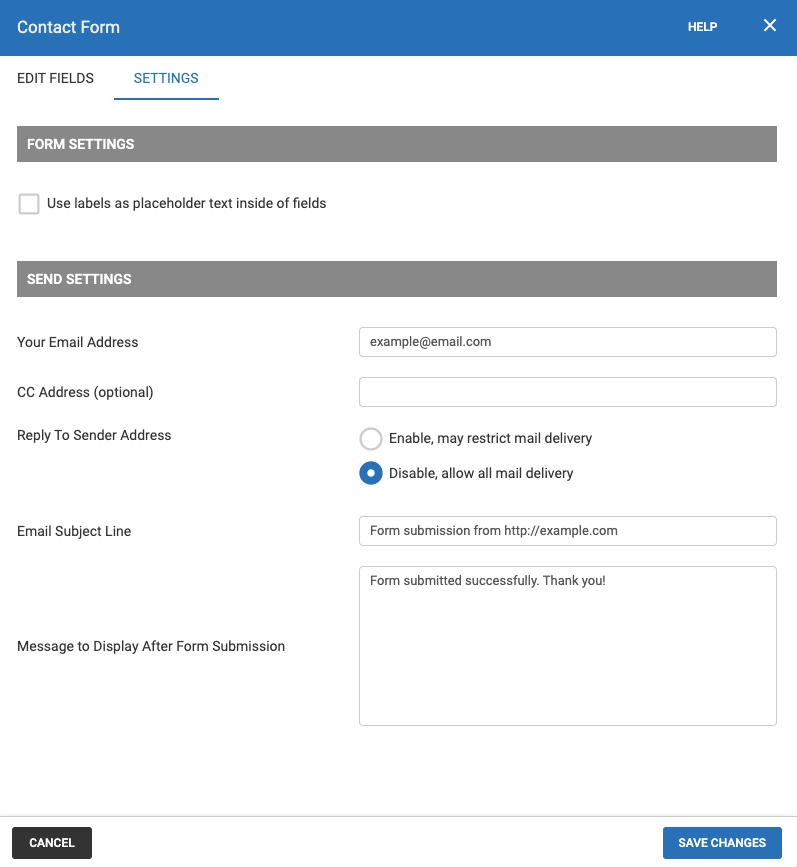
In order to receive entries to your new contact form you will need to configure the Contact Form element to send entries to your your email address. Once you have added the Contact Form Element to your page click the "Form Settings" option in the Element's Toolbar to open the Contact Form Settings tab. From here simply type your email into the "Your Email Address" field in the Send Settings. You can send a copy of the entry to multiple other email addresses by adding them (comma separated) to the "CC Address" field below.
Set a custom subject line for your Contact Form entries under "Email Subject Line". You can also fill in the "Message to Display After Form Submission" to customize a message that will appear on your page where the Contact Form is after someone sends a message.
Check the "Use labels as placeholder text inside of fields" check box to move your Contact form label text
To confirm the changes you have made in the Contact Form Settings, make sure you click the "Save Changes" button.
We welcome you to send a test message to your own contact form by visiting your website logged out, to see how this Contact Form will look to your visitors. This will also give you an idea of how you will receive these messages in your email inbox.
Reply-To Sender Address
When someone submits an entry on your contact form, you will receive an email with this information. We've recently made an adjustment to our contact forms to enhance their reliability. In order to do so we have disabled the customer's email address from the reply section to ensure you receive their message. We did this because many popular email providers (such as Gmail or Hotmail) are increasing their spam filter requirements, and having a different address in the reply section can cause it to be incorrectly marked as spam. In order to reply, please send emails to the customer's address that is specified in body of the email. Do not click the reply button as this will simply reply to Bravenet’s email address.
If you wish to enable having the customer’s email address in the Reply section, simply click the “Enable” radio button in the contact form settings. Please be aware this may cause email deliverability issues.
Options
Customize your Contact form by adding your own fields, radio buttons, dates, drop-down menus, and more. To get started, simply go to the "Edit Fields" option in the Element Toolbar to access the Form Design window.
You can drag any of the following items from the left column into the "draggable" areas of the Form fields:
The submit button is required and cannot be removed, however, you can change the text that displays on the button, or choose an image instead.
Text Input: A box for a simple single line of text to be entered. Great for names and e-mail addresses.
Text Area Input: A box for multiple lines of text to be entered. This is better for paragraphs and addresses.
Radio Option: A tool for allowing the form user to choose between selections or options, such as "yes" and "no". A choice can be made and changed, but not removed completely.
Checkbox Option: A simple check box for tasks such as asking the user whether they would like to sign up for your mailing list. Can be selected or deselected.
Dropdown Select: A tool for allowing the user to make a choice between items in a drop-down box. Great when allowing the user to choose their country of residence, for example.
Heading: Add a heading to organize your form.
Paragraph: The paragraph allows you to display a message to the user, the paragraph will appear in the form and in the email received.
Label: A simple line of text. Great for adding a title to break up your form.
Date Field: A field where a date can be typed in or selected from a calendar that appears when the field is clicked on.
Time Field: A field where a date can be typed in or selected from a drop-down menu that appears when the field is clicked on.
File Attachment: A field that a file can be uploaded to when the "Browse" button is clicked.
Note: Clicking the "Required" checkbox will allow you to make the field mandatory!