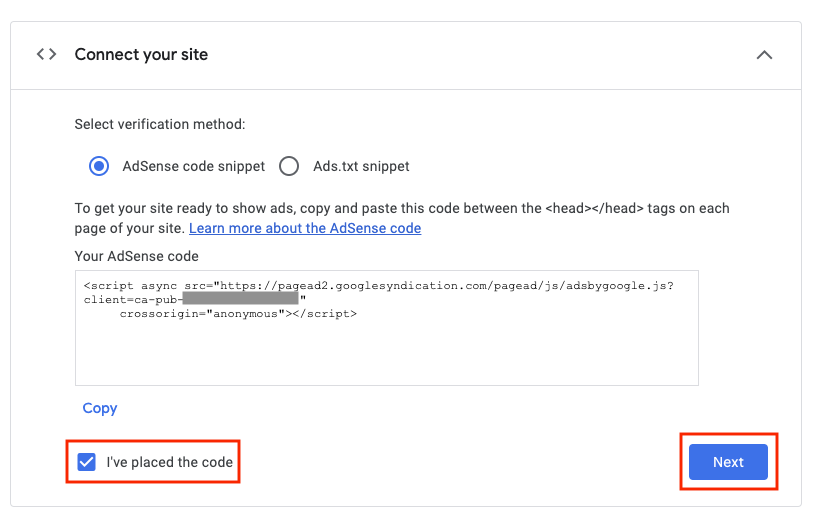
This option will allow you to change such page information as Name and Description as well as modify the Page URL Location. The Page Name will be used in the navigation of your site, as well as on any links to this page.
Note: Anything entered into this field will automatically be entered into the page location as well for convenience, however, the location can be renamed if desired.
The Page URL is the path to the page that the user will see in the address bar when visiting your website. New folders are created in this area. If the "Publish Now" check box is not selected, the page will not automatically be published.
Where to Find
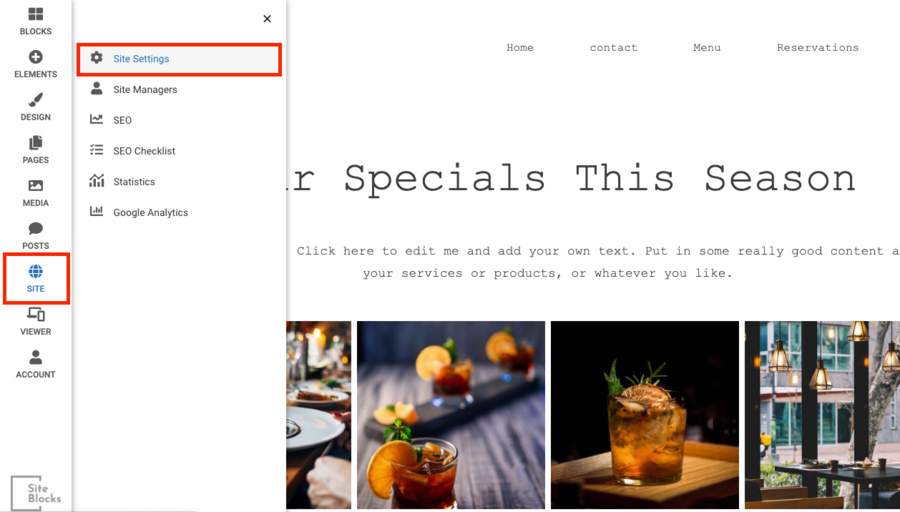
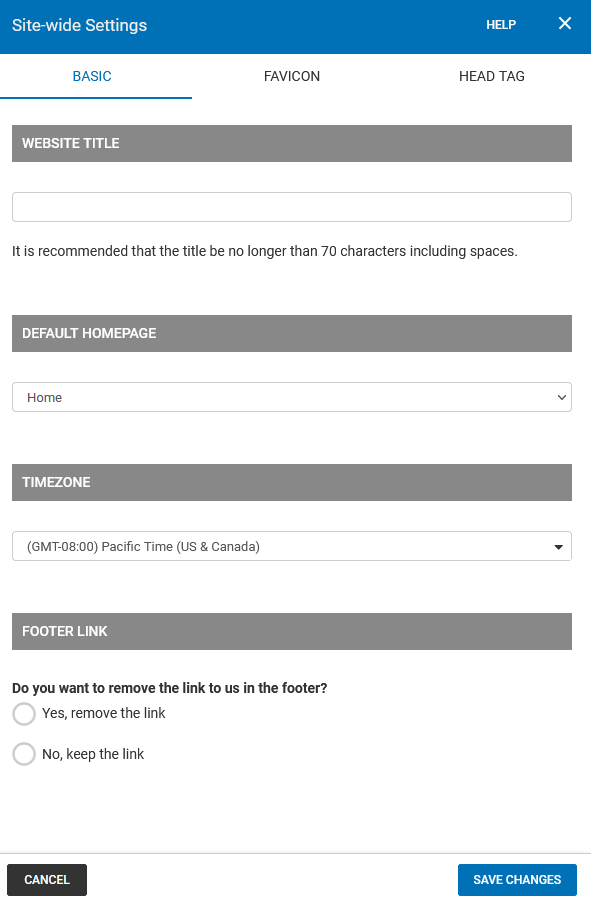
Clicking the "SITE" button in the main toolbar, as in the below image, will bring up the "Site Settings" option in the menu, from here you can set a website title and other basic settings.
Note: Page-specific settings can also be managed in the "PAGES" section of the Toolbar. Here you can select the cogwheel icon on the page you wish to manage to bring up the "Settings" sub-menu.

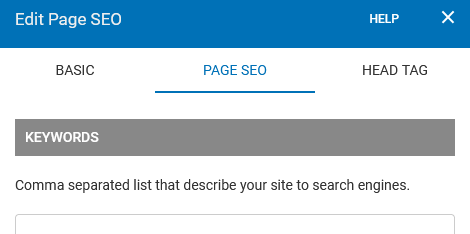
Page SEO
Custom Keywords are used by some search engines for indexing your website. Keywords should be in a comma-separated list (eg: hockey, sport, NHL).
The Description will be used in the meta tags when people or search engines visit your website. Most search engines will use the description for a summary in their search results.
Note: The meta tag information added here will be specific to the page you're modifying the settings for, and not for your entire site! To create meta tags for your entire site, please add them to the Keywords area in the Head Tag section of your Site-wide Settings.
Where to Find
Clicking the "SITE" button in the main toolbar, as in the below image, will bring up the "SEO" option in the menu.
Note: Page-specific SEO settings can also be managed in the "PAGES" section of the Toolbar. Here you can select the cogwheel icon on the page you wish to manage to bring up the "SEO" sub-menu.
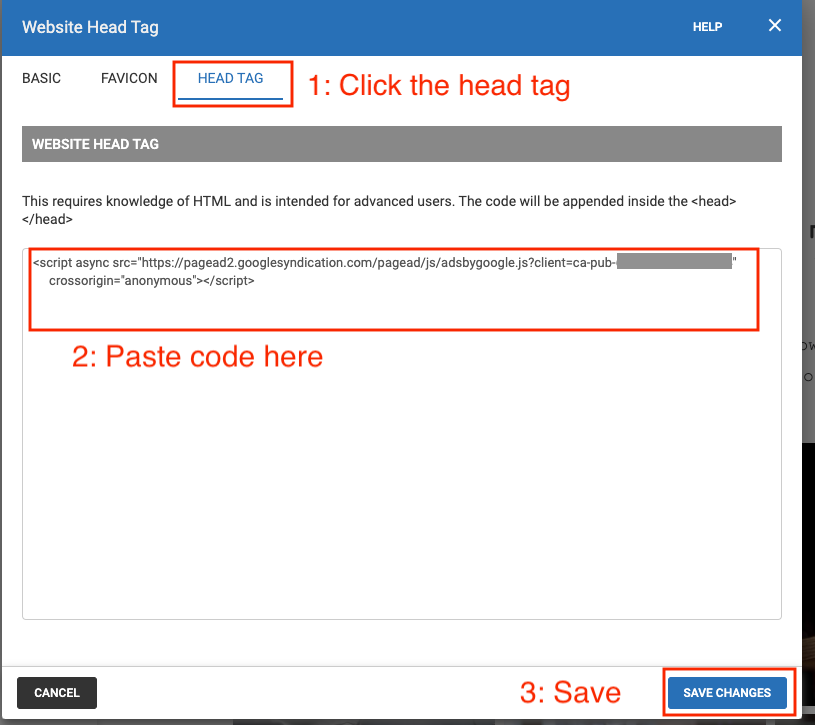
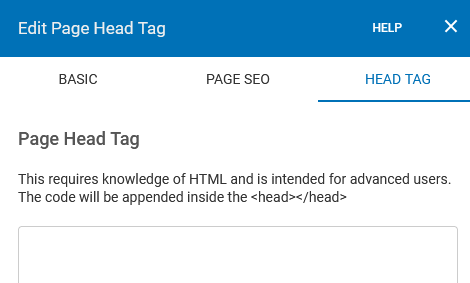
Page Head Tag
This section requires knowledge of HTML and is intended for advanced users. Code will be appended inside <head></head> tags.
Where to Find
Clicking the "SITE" button in the main toolbar, as in the below image, will bring up the "Site Settings" option in the menu, from here you can select the "Head Tag" tab.
Note: Page-specific headers can also be managed in the "PAGES" section of the Toolbar. Here you can select the cogwheel icon on the page you wish to manage to bring up the "Settings" sub-menu.