Menu

Welcome to the SiteBlocks Site Builder

HELP CENTER

Blog posts : "General"

Capture your visitor's attention by adding images to your blog posts!


SiteBlocks offers many different ways to include images on your site. To begin, simply create a new blog post or edit an existing one to access our Blog Post Editor (for more information please see our article on Creating a New Blog).  From here, you can click the image icon in the ribbon toolbar in the text editor and upload an image using the following ways:
 
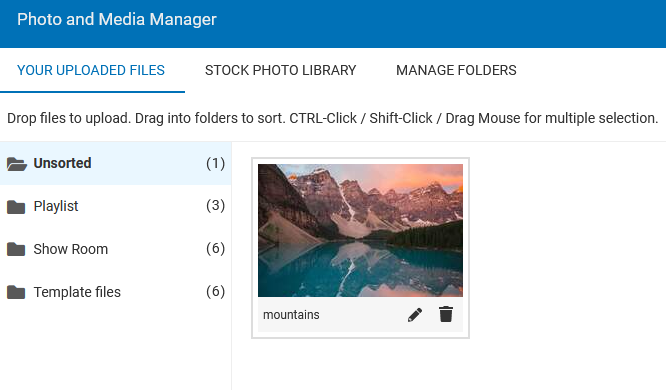
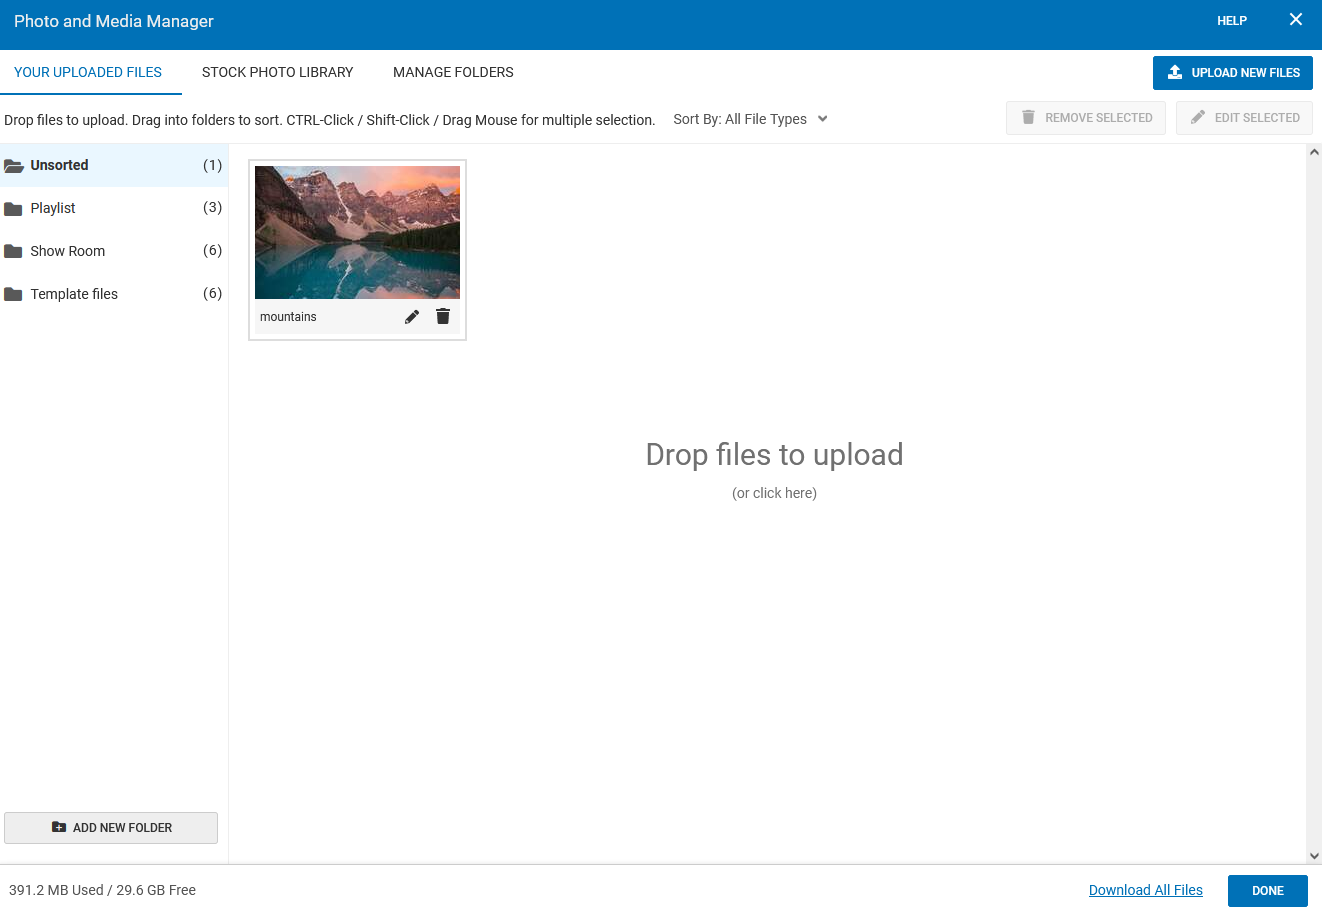
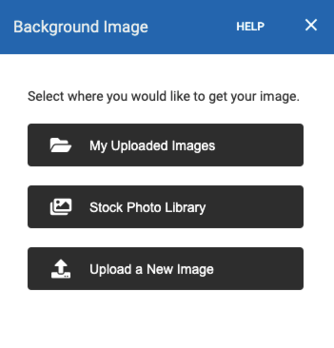
  • My Uploaded Images - You can include an image that you have previously uploaded to your Photos and Media manager by selecting the "My Uploaded Images" button. In the Photos and Media Manager, you can browse your file library and folders for the image you would like to add. Select your image and click the "Use Select File" button in the bottom right corner.
 
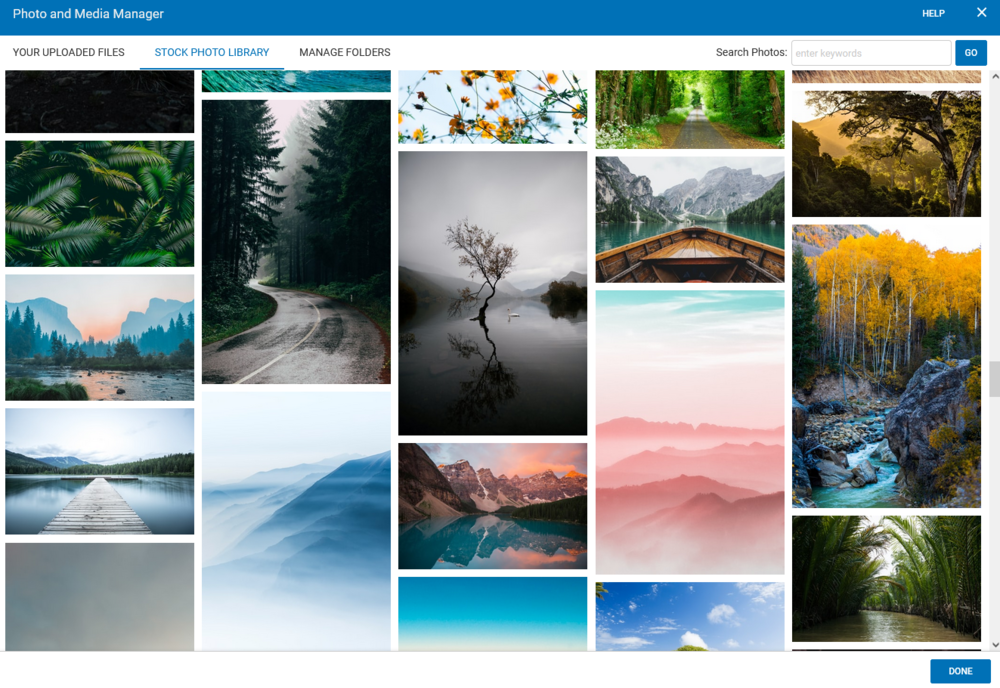
  • Stock Photo Library - SiteBlocks Members enjoy access to over 150,000 free stock photos for use on site. We welcome you to explore and use this library! To upload a stock image to your blog, click "Stock Photo Library" to browse and search for an image you would like, and click on the image to select it. Once you have selected your image, you will be brought to an image preview page where you can "Use This Image".
 
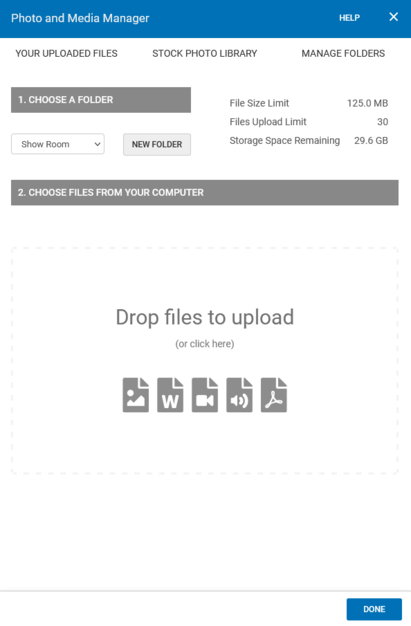
  • Upload new Image - If you already have an image on your computer that you would like to upload to your blog post, click the "Upload new Image" button. Select the folder you wish to upload your file(s) to. If this is left unselected, files will go to the default unsorted categorization. Next, drag and drop or click the upload screen to upload files from your computer. 
 
  • Upload Image from Flickr - You can upload images from Flickr, all you need is the username of the account you would like to add an image from. To begin, click "Upload Image from Flickr". Type in the username of the Flickr account then "Browse Images". Click the "Select Image" hotlink below the image of your choice.
 
  • An External Image URL - If you have the URL of an image you would like to upload, click the "An External Image URL" button to begin. Simply paste in the link of a valid image URL. Please ensure you own the rights to the image in the URL or have permission to link this external Image URL.


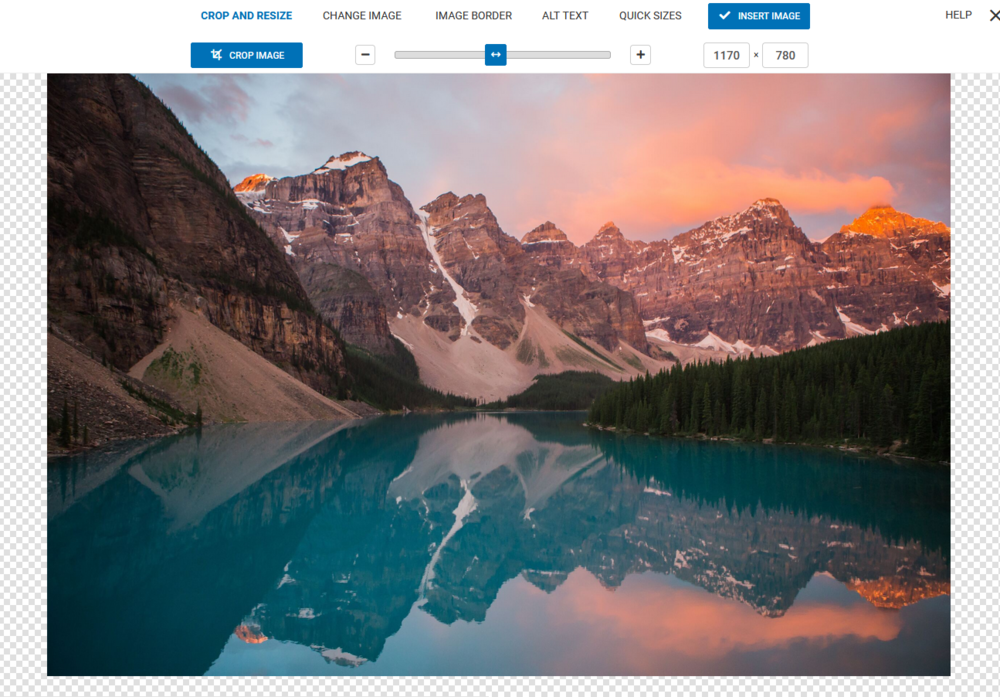
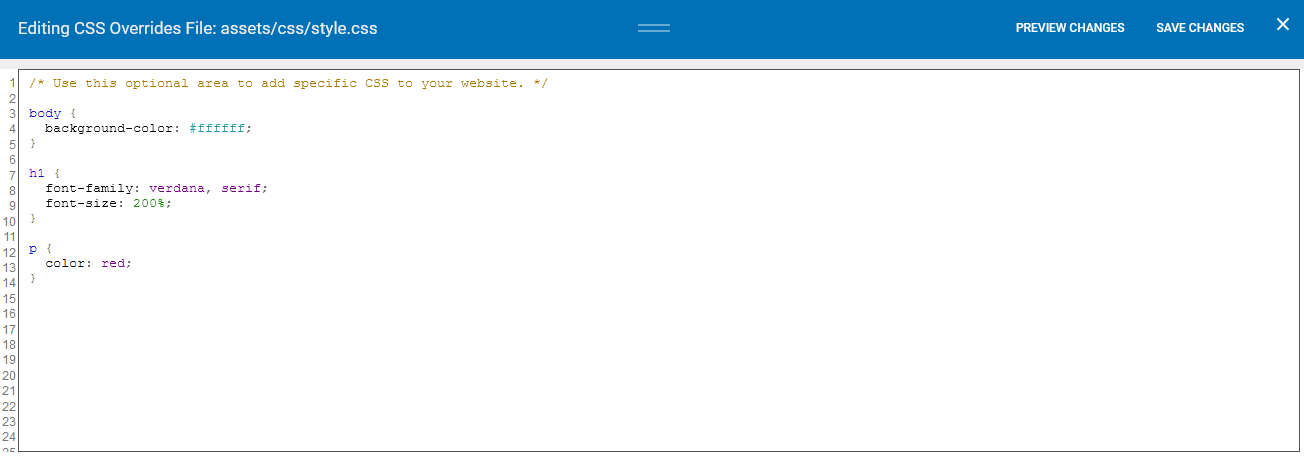
Before adding this image to your blog, you can adjust how it will appear on your post. Feel free to resize the image using the slider (this shows a to-scale representation of the image) or click the Quick Sizes tab for popular image sizes You can style your image with a border under the Border tab. You can also add ALT text by clicking the ALT tab. The ALT tag of an image provides alternate text that assists screen readers, and search engines and provides text if the image does not load. It also appears when you mouse over the image. Lastly, if you change your mind about the image you can upload a different one by using the "My Images", "Upload Image", or "Stock Photos" buttons listed under the Change Image tab.

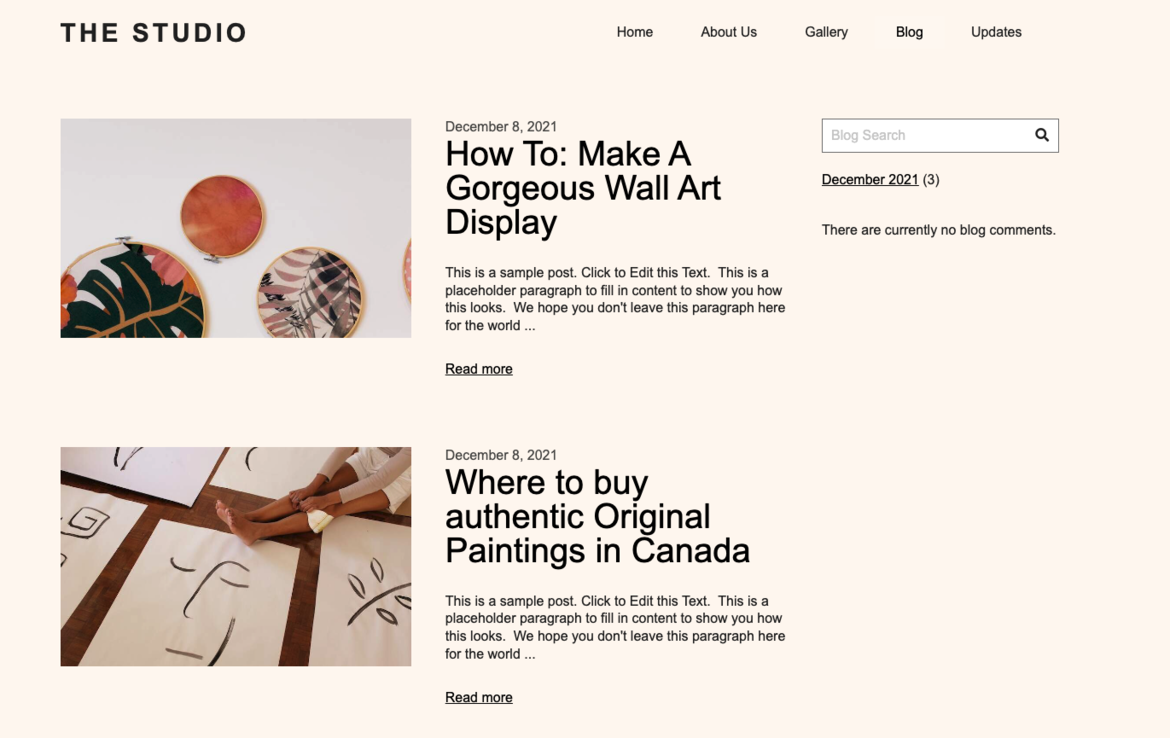
Publish your blog post to see your Image on your blog page.


Adding a Feature Image

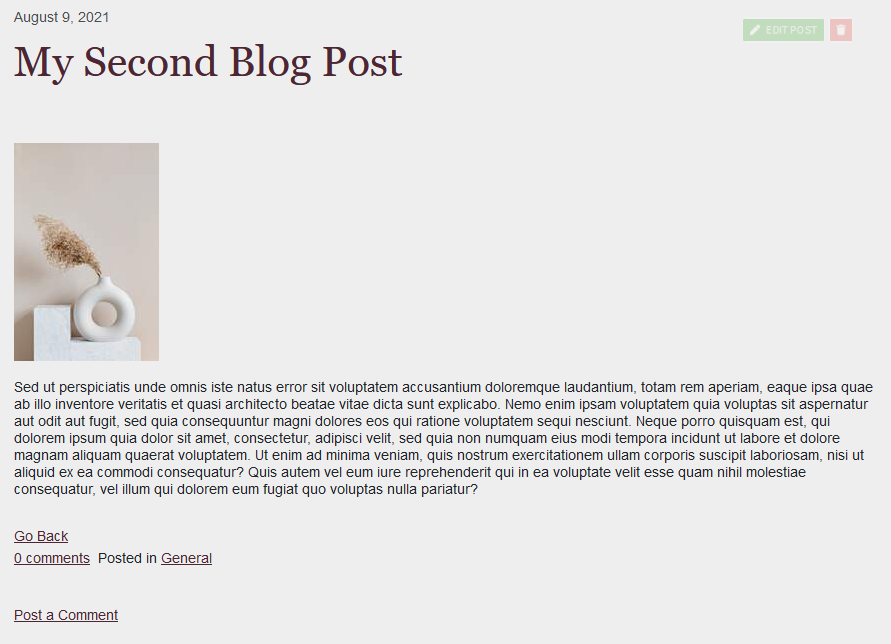
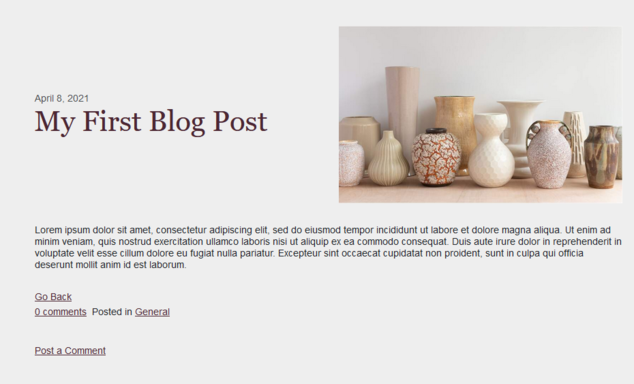
You can also add a Feature Image to display at the top of your blog post next to your post title. This will be the first image to catch your visitor's attention when viewing your blog post.

To add a featured image, simply edit the blog post and click "Choose" in the top right corner to choose a featured image.

Go Back

Columns

Display and organize your content on your website in creative and visually appealing ways by making use of Columns. Columns allow you to display multiple elements across a single row on your page.


Add your elements to the column containers to create visually appealing content with a custom layout.


Adding Columns


Browse different Column layouts in the Blocks list which can be found on the main toolbar when editing your website. You can choose from different column layouts, allowing anywhere from 1 to 7 different columns in a single row. To add the column, simply drag the column into a New Block or a New Row indicated by the purple or orange ribbons respectively.


To find empty columns simply go to BLOCKS in the main toolbar and drag in a column from the pre-made Blocks list.


Adding Content to Columns


Columns act as containers for Elements that you can add to your page. To add a new Element to a Column, drag the element of your choice into the column from the Element List or by clicking the blue “Add Content” button in the center of the column. You can also click-and-drag pre-existing elements from your page into the column by hovering your mouse over the element to grab the element by the “ “ symbol.
If you would like to change the element in the column, removing the element from the column will allow you to add another element in its place. Simply click “Remove” in the Element Toolbar to remove the current element.

Note: You can use a Spacer element to create empty space between multiple columns in a row. Simply drag in a Spacer element from the Element List.


Removing a Column


You can remove a column from a row and the content will adjust to equally fill in the remaining space.


Simply click “Remove Column” in the Blue Column Toolbar to remove the current element.


If your column is empty, click the red “X” in the top right of the column to remove it. 


Edit Column Style


You can style your columns by adjusting the spacing, background and and creating borders for your columns in the Column Styles toolbar. To open Column Styles, this can be selected from the Column toolbar. Once you have styled your column to your liking, click “Save” to confirm your changes.


Go Back

Managing Blog Categories

Separating your posts into different categories allows you to display different posts on different sections of your website, or simply to allow visitors to browse your posts by topics of their interest.

You can manage your blog categories from the "POSTS" button on the left sidebar of the editor and then select "Blog Posts" from the submenu. This will bring you to the Blog Posts Manager, where you can manage your categories under the Categories tab. On the right you can create a new category by typing in the category name and then clicking "+ Create". On the left side of the Categories tab, you can view what blog posts are currently listed in that category by clicking the eye icon.


Password Protect a Category


You can create private categories that only visitors with a password can view. To create a password-protected category, click the padlock icon  
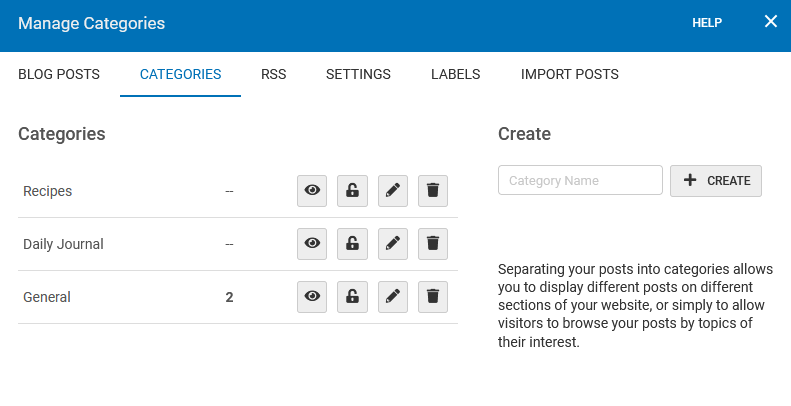
next to your category to begin. You will then be brought to a page where you can type in your password. Optionally, you can add a message for your visitors and type in the custom text for the password field and submit button that your visitors will see when prompted to enter their password. Once this is all filled out, simply click "Save Changes". Password-protected content will not be searchable by the Blog Search tool.


Rename a Category


You can rename a category at any time by simply clicking the pencil icon  next to your category, this will allow you to type in a new name on the right-hand side under Rename Category and then "Save".


Delete a Category


You can delete a category by simply clicking the trash icon  next to the category you want to remove. Please note this will not delete the posts inside of the category. You will need to move the blog posts inside of the category to a new category first or these will all be moved back to the General category (if the General category no longer exists, they will be moved to a different remaining category).


Assigning Blog Posts to a Category


When creating a new post, select the Blog Posts Options tab and select the category of choice from the Category dropdown menu. To assign an existing blog post to a new or different category, edit the blog post in the Blog Posts Manager (located in POSTS > Blog Posts) by clicking the pencil icon , from here you can click the Blog Posts Options tab to assign a different category.


Go Back

Navigation Bar

Adding A Navigation Bar


To add navigation to your website, you can drag a "Primary Navigation Bar" in from the elements list, or you can drag in a pre-designed Header Block, from the left side menu, where you can just edit the navigation to match your website.


Creating New Navigation Themes


To create a custom theme for your navigation, hover over the main navigation on your website until the orange dropdown appears. Select "Swap/Edit Theme" which will bring up the primary navigation menu. From here you can create a new theme, or edit the current one. Select "Create A New Theme", here you can edit fonts, colors, hovers, etc. 


Using Multiple Navigations For Your Website


If you want to have a different style of navigation on your Home page versus the rest of your website, create a new navigation theme under the Primary Navigation Menu. Once you have multiple navigation styles created, go to the page you want your second navigation style, hover over the header, and click on the green "Header A" tab.


From here you create a new Header B. Go back to the Primary Navigation Window, and select the new Primary Navigation you just created. From here you can customize your Header B, which will not affect Header Style A


How To Customize Drop-Downs


To create a drop-down on your primary navigation, go to Swap/Edit Theme from the Element's Toolbar, create a new navigation theme or edit the current navigation by clicking the pencil icon. Click the "Dropdown" tab and here you will be able to customize the look of your drop-downs.


How To Add Site Pages To Navigation Drop-Downs


Create a page that you'd like to be within your navigation drop-down through the left side menu "Pages".  Now hover over your main navigation until the orange dropdown menu appears, and select "Edit Menu Items".  With your cursor, grab and drag the page you just created so that it sits under the page you want the dropdown to be located. Now grab the new page again and drag it to the right.


Adding Link Navigation Items


To add a navigation item, click "Edit Menu Items" in the Navigation Bar toolbar to access the Primary Navigation Manager.

Select from one of the following options for creating a navigation item in the left column:


Link to a page: You can add a navigation link in your navigation bar to any page that already exists on your website. Select the page from the Select A Page dropdown menu. Next, you can customize the navigation item Label under the Label field (this is what will appear on your navigation bar).


Link to a file: You can link to files that you have uploaded to your Photos and Media Manager (including Word documents, pictures, PDFs, etc.). Click "Browse Uploaded Files" to open the Photos and Media Manager to select a file you would like to link. Select the file and click the "Use Selected File" button in the bottom right corner to choose the file. You can check the "Open file in a new window" checkbox if you don't want your visitors to leave the current page when clicking the file, alternatively, this will open in a new tab. 


Link to a website: You can add a navigation link in your navigation bar to an external website. Paste the entire website URL (for example: http://websitename.com) into the Website URL field. Next, you can customize the navigation item Label under the Label field (this is what will appear on your navigation bar).


Link to an email: You can prompt your visitors to open a new email message that is addressed to your email. Fill in a valid email address in the Email Address field. Next, you can customize the navigation item Label under the Label field (this is what will appear on your navigation bar).


Link to a blog page: You can add a navigation link in your navigation bar to your blog page. Type in your blog page path name (this is usually "blog") or type in a new path name to create a new page containing a blog element. Next, you can customize the navigation item Label under the Label field (this is what will appear on your navigation bar).


Text only: Add a text-only navigation item is a great way to add context and organization to your navigation bar. Use this to create labels and titles for your navigation links.


Editing Navigation Items


To edit a navigation item, click "Edit Menu Items" in the Navigation Bar toolbar to access the Primary Navigation Manager. Click the pencil icon to edit the Navigation Item, from here you can edit the label and navigation link.


Navigation Link Styles
To create a custom style for your navigation bar links, hover over the main navigation on your website until the orange dropdown appears. Select "Swap/Edit Theme" which will bring up the primary navigation menu. From here you can select the Links tab.


Link Style: Style your links by selecting a font (including the family, size, color, and style) of your choice. You can also set a custom background and adjust the padding and margin surrounding your links. 


Link Hover:  When a visitor hovers their mouse pointer over your Navigation item, make the item pop by changing the link style. You can change the font or background color, while will add some interactivity to the navigation bar.


Link Active:  If your visitor is at a location on your website that is indexed by your navigation bar, you can indicate this by changing the style of the currently active Navigation link. You can change the font or background color, while will add some interactivity to the navigation bar.


Go Back

How Much Does It Cost?

SiteBlocks Pricing and Terms

We think you'll find we offer excellent value for each hosting package and that they are an affordable solution to your website hosting needs. As these prices and terms are subject to change, they will not be replicated here, but the most current available packages can be viewed per the below links.


Current plans and pricing can be found at the following page: http://siteblocks.com/about/pricing

Alternately, if you're logged into your account currently, this address will get you there: http://siteblocks.com/account/plans

Go Back

SiteBlocks Storage and Bandwidth Availability
 

The Storage and Bandwidth available to you are dependent on which service level you're currently using. To determine this, simply log in to your account. You will see this information immediately on your Account Overview page.

We suggest you visit our Pricing and Terms page for full details regarding what each of these packages offers: http://siteblocks.com/about/pricing


Alternately, if you're logged into your account currently, this address will get you there: http://siteblocks.com/account/plans


Upgrading your Storage and Bandwidth


For more information on upgrading your service level, please see Upgrading your SiteBlocks Hosting Package.


Go Back

Managing Comments

Managing Comments


This section will serve as your Blog comments manager. You can approve or delete newly received comments before they appear under the blog post.


This area can be found in the "Visitor Comments" under "POSTS" located in the left toolbar. This interface provides a simple, yet effective means of managing your comments as well as showing you who posted the comment, the blog post the comment was left on, the status, and the date posted.


Clicking on the comment title link under the Comment heading will allow you to manage that specific comment. This can be helpful if you made a mistake approving a comment, or if you wish to remove a comment that was automatically approved. The e-mail address the poster provided can also be found here. Unfortunately, deleted comments cannot be restored.

Clicking on the post title link under the “Commented on” heading will take you directly to the blog post on which the comment was made.

If you have configured your comments to require approval before being displayed, you will see that all comments in this area are awaiting your decision. Simply click the checkboxes in the far-right column and click any of the "Approve" or "Delete" buttons above to take the appropriate action.


Managing Comment Settings


You can manage your comment settings under the Settings tab of the “Visitor Comments” section. These settings will affect all comments that have been added to your website. These settings are for both your Blog and Comment elements.


You can choose how all new comments will be handled automatically by choosing either "Publish Immediately" or "Hold for Approval" here.

You can optionally Require Captcha verification for your comments. This will help to add extra spam prevention (on top of our current spam prevention measures) by requiring that all comment posters enter a unique set of characters that will help to verify that they are not spamming bots. This is a small box that appears on any comment page associated with a blog post. Comments are enabled by default, but you can optionally configure them to appear only for a number of days of your choice before being deleted automatically or disabling them altogether.

A Gravitar or globally recognized avatar is quite simply an avatar image that follows you from blog to blog appearing beside your name when you comment on gravatar-enabled sites. This setting will allow you to enable these or specify that you do not want them to display.


Deleting Comments


To delete a specific comment under a blog post, click the “Comments” section to view your comments. From here, you can delete any unwanted comments by clicking the trash icon.
 
You can also delete multiple comments from the “Visitor’s Comments” section. Simply click the checkboxes in the far-right column and click the “Delete” button to delete these comments.


Managing Comment Spam


A great way to prevent spam in your comment section is to Require Captcha verification for your comments. This option will provide a method to verify that your comment is not a spamming bot. To enable this for your comments on existing blog posts, ensure the “Require Captcha Verification” checkbox is selected in the “Visitor Comments” Settings tab. 


Setting Comment Approval


If you want to approve comments before others can see them, you can turn this on by selecting the “Hold for approval” option from the drop-down menu. Selecting the “Publish immediately” option allows anyone to comment without your approval.


Go Back

Creating A New Blog

Related Topics: Managing Blog Posts , Managing Blog Comments​ Managing Blog Categories , Managing Your Blog RSS Feed , Advanced Blog Settings , Blog Label Settings , Adding Images to Blog Posts

Creating a New Blog Post

Each SiteBlocks website comes with a built-in blog feature. To create a new blog post, you will want to access the "Manage Blog Posts" section by clicking "POSTS" and then "Blog Posts" in Blog Element the Toolbar. Then, simply click the "Compose A New Blog Post" button to get started. 


You can also create new posts directly from your blog post element by clicking "New Post" on the Blog Post's Toolbar if the element has already been added to a page.


If you are editing a post, it will already be published, however, new posts will be able to be saved as a draft for later editing and posting in the Manage Blog Posts area. This will be verified in the "Manage Posts" area. 


Initial Setup


If this Blog has not been added to your website as an element yet, you will need to make sure you add it to your website to ensure the posts are visible to your visitors. To add your Blog as an element, simply click the "ELEMENTS" button on the main toolbar and drag and drop a "Blog Posts" element to your page.


If you would like to choose a preset layout, you can browse these and more by clicking the "Layout/Settings" menu option located on the top left of your Blog Posts element on your page. Preset Layouts are great for creating a blog post with appealing formats.


Edit Blog Posts


The post title can be changed by editing the blog post.

You can control the post details for the blog entry under Blog Post Options by editing the blog post. The Date Published time and date can be modified simply in the Blog Post Options area so you can have the proper setting when the entry is ready to be published. 

The AutoSave Every Minute option allows you to use our auto-save feature, allowing you to be sure your content won't be lost should there be an issue during editing.


Blog Post Options


You can access the Blog Post Options tab by editing a post to access the Edit Blog Post area.

The Custom Permalink field will allow you to enter a permalink into a text box that will be added to the Blog Post Title once published live.

The post Category can be changed here as well. If you would like to add this to a new category, you can create one by clicking the 'New Category' link. Clicking on the Announce To check boxes will allow you to automatically announce your post to Facebook and Twitter. This is only available when creating a new blog post.

The Published date and time can be modified in this area as well so you can have the proper setting for when the entry is ready to be published. ​

Comments can be enabled or disabled here via the Allow Comments check box. This will be enabled by default but can be disabled here later if necessary. These can be managed at any time in the "Visitor Comments" area of the "POSTS" section of the Toolbar.


Adding a 'Read More' link


You can insert a 'Read More' into the body of your blog post to separate your post content between what displays on your website, and the rest of the content (including the pre-read more content!) which will display on the page dedicated for all post content.

So what does this mean and why would you want to do this? This is most commonly used to keep neat and tidy the page where the blog posts are appearing - using just a portion of the full post - serving as a "preview" of your post, with a way for readers to click on a link if they are interested in reading the rest of the post.

To add one, click on an area in the body of your post where you want to insert it, and click the "Read More" button . A dotted line will appear in your blog post when editing to indicate where the read-more will begin.


Go Back

Using Custom CSS

SiteBlock's templates are simply written in normal, standards-based HTML and CSS, with certain HTML elements defined as content locations where dynamic content is automatically inserted. Unfortunately, it is not possible to change the template of your website. If you would like to add changes to your current template you can add specific CSS to override the current CSS file. 

Please Note: Using CSS to manage your template is an advanced topic and is entirely optional. SiteBlocks can be completely edited and customized without the use of CSS and using CSS is entirely optional.


Where to Find

While editing your website, click the "DESIGN" button located in the left toolbar, next, click "Edit Website CSS" in the submenu.


From here you can add your CSS. Click "Preview Changes" to see any changes before saving them using the "Save Changes" button.


Collapsing Blocks
 

If you wish to add CSS to a particular element, it can be helpful to collapse the blocks to find the CSS ID. This way, you can use the CSS ID as a selector for that individual element. To collapse blocks, go to the 'DESIGN' menu and then click 'Collapse Blocks', this will temporarily collapse all blocks in view, and display their CSS ID. This will only be visible to you in the editor, your visitors will still see the normal view of the blocks and elements on your website.


Once you are ready, you can expand the blocks by navigating to the 'DESIGN' menu, then click 'Expand Blocks', or click the orange "Expand Blocks" button found in the top left corner of the page.


Go Back

Managing Blog Posts

​Editing a Blog Post


You can edit and manage your blog posts by clicking on "POSTS" in the Main Toolbar and then clicking "Blog Posts" in the sub-menu. If the Blog Posts element is already added to your site, you can click on the edit or delete icons on the right side of the post.


The post title can be changed on this page. The Content Templates in the left pane allow you to choose a preset layout to make creating a blog post in some common styles with pictures easy.


You can change the Publish setting for the entry. If you are editing a post, it will already be published, however, new posts will be able to be saved as a draft for later editing and posting. This will be verified in the "Manage Posts" area. The Date Published time and date can be modified simply in the Blog Post Options area so you can have the proper setting when the entry is ready to be published.


The AutoSave Every Minute option allows you to use our auto-save feature, allowing you to be sure your content won't be lost should there be an issue during editing.


Deleting a Blog Post


You can delete a blog post by clicking on the trash icon in the "Manage Blog Posts" section of the Toolbar by clicking "POSTS", then "Blog Posts". A confirmation box will appear and you will be asked if you are sure you would like to remove the post before it can be deleted.

You can delete a blog post in the Manage Blog Posts menu by clicking on the trash icon.


Viewing a Blog Post


You can view a Blog post by clicking on the eye icon  
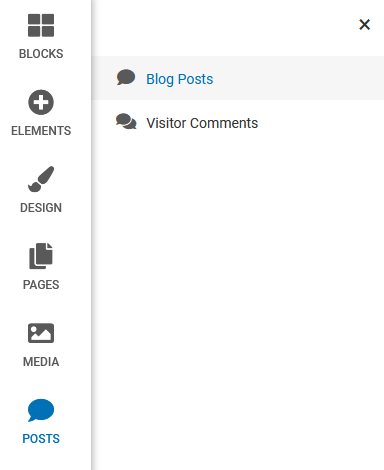
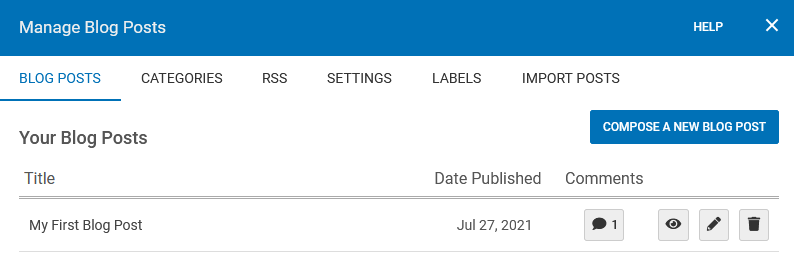
in the "Manage Blog Posts" section of the Toolbar by clicking "Manage Website" then "Blog".


Importing Blog Posts


If you have blog post content already created through another hosting provider and want it to display on your site, you don't have to copy and paste the content into individual blog posts - you can import it directly into your blog! This is much quicker, more convenient, and less hassle.


Blog post importing options can be found by clicking on the "Import" tab in the "Blog Posts" section of the Toolbar.


Managing Comments


This section will serve as your Blog comments manager. You can approve or delete newly received comments before they appear under the blog post.


This area can be found in the "Visitor Comments" under "POSTS" located in the left toolbar. This interface provides a simple, yet effective means of managing your comments as well as showing you who posted the comment, the blog post the comment was left on, the status, and the date posted


Clicking on the comment title link under the Comment heading will allow you to manage that specific comment. This can be helpful if you made a mistake approving a comment, or if you wish to remove a comment that was automatically approved. The e-mail address the poster provided can also be found here. Unfortunately, deleted comments cannot be restored.


Clicking on the post title link under the “Commented on” heading will take you directly to the blog post on which the comment was made.


If you have configured your comments to require approval before being displayed, you will see that all comments in this area are awaiting your decision. Simply click the checkboxes in the far-right column and click any of the "Approve" or "Delete" buttons above to take the appropriate action.


Managing Comment Settings


You can manage your comment settings under the Settings tab of the “Visitor Comments” section. These settings will affect all comments that have been added to your website. These settings are for both your Blog and Comment elements.


You can choose how all new comments will be handled automatically by choosing either "Publish Immediately" or "Hold for Approval" here.


You can optionally Require Captcha verification for your comments. This will help to add extra spam prevention (on top of our current spam prevention measures) by requiring that all comment posters enter a unique set of characters that will help to verify that they are not spamming bots. This is a small box that appears on any comment page associated with a blog post. Comments are enabled by default, but you can optionally configure them to appear only for a number of days of your choice before being deleted automatically or disabling them altogether.


A Gravitar or globally recognized avatar is quite simply an avatar image that follows you from blog to blog appearing beside your name when you comment on gravatar-enabled sites. This setting will allow you to enable these or specify that you do not want them to display.


Deleting Comments


To delete a specific comment under a blog post, click the “Comments” section to view your comments. From here, you can delete any unwanted comments by clicking the trash icon.
 
You can also delete multiple comments from the “Visitor’s Comments” section. Simply click the checkboxes in the far-right column and click the “Delete” button to delete these comments.


Managing Comment Spam


A great way to prevent spam in your comment section is to Require Captcha verification for your comments. This option will provide a method to verify that your comment is not a spamming bot. To enable this for your comments on existing blog posts, ensure the “Require Captcha Verification” checkbox is selected in the “Visitor Comments” Settings tab. 


Setting Comment Approval


If you want to approve comments before others can see them, you can turn this on by selecting the “Hold for approval” option from the drop-down menu. Selecting the “Publish immediately” option allows anyone to comment without your approval.


Go Back

Clicking on the "Updates & Newsletter" link in your Account Overview area will bring you to the website builder Updates center, where you can be linked to all of our methods of keeping members updated on upcoming changes and new features, as well as outlining some of the most recent website builder news.

Here you will be quickly linked to our Blog and Twitter feed, where we post website builder news as it happens, with a shortlist of archived blog posts displayed and linked to below.


Where to Find


Once you have signed into your SiteBlocks account, simply scroll to the bottom of the main Dashboard page. Click on the “Updates & Newsletter” link under the Account section.


SiteBlocks Newsletter


We occasionally send emails to our members when there are noteworthy improvements or other important updates.


Subscribing to our Newsletter


You can subscribe to our newsletter in this area, which will further keep you informed by delivering periodical updates to your mailbox, by clicking on the "Subscribe to Updates" link. This will result in the subscription area changing to reflect this.


Unsubscribing from our Newsletter


If you are currently subscribed to the SiteBlocks newsletter, this preference will be displayed under Receiving Updates. To unsubscribe, simply click the Unsubscribe from Updates button. Alternatively, if you received any newsletters from us, there will be an option to unsubscribe located at the bottom of the email.


Note:
We do not resell or otherwise compromise your e-mail address information and subscribing will not allow it to be used for any other purpose except these newsletters.


Go Back

Creating An E-mail Address
 

Custom e-mail addresses can easily be created and managed within your website builder account. This is great as it allows you to use e-mail addresses associated with your site address for greater professionalism, and they can be conveniently managed within your website builder account along with your domains and websites.


Once you have purchased or connected a domain to your account, you are ready to get started. Simply click "Add Email to A domain" under the Email Accounts section.


Managing An E-mail Address
 

After an e-mail address has been created, it can be managed at any time by clicking the "manage" button beside it.


From here you can:

  • Login with webmail
  • Change password
  • Delete e-mail address
  • Acquire third-party mail client login information


E-mail Client Configuration Settings
 

These are the email configuration settings that must be used if the email account is to log in on a third-party email client, such as a mobile phone or desktop email application. IMAP and POP3 are alternative inbound email protocols, and we highly recommend users always utilize IMAP if possible. POP3 is suitable only for a singular device that accesses the email client, whereas IMAP allows many devices to potentially do so without issue.

POP3 is an older method of checking mail. It should only be used if your e-mail client doesn't support IMAP, since POP3 doesn't support checking mail from multiple locations, and by default, it doesn't store messages on the server.

To clarify: We do NOT recommend using POP3, and in fact, recommend switching to use IMAP in every situation if at all possible.


Recommended Settings
 

Incoming Mail Settings:

  • Email Protocol: IMAP
  • IMAP Server: mail.mboxlogin.com
  • IMAP Port: 993
  • Connection Security: SSL
  • Username: The email address you are checking, e.g. example@somesite.com
  • Password: The password for this specific email account.
  • Authentication Type: Password

Outgoing Mail Settings:

  • SMTP server: mail.mboxlogin.com
  • SMTP port: 465
  • Connection Security: SSL
  • Username: The email address you are checking, e.g. example@somesite.com
  • Password: The password for this specific email account.
  • This outgoing mail server requires authentication (this is an option in some email clients, which must be checked).


Alternative Settings
 

You should only use these settings if for some reason the recommended settings are not possible with your email setup.

Incoming IMAP Protocol:

  • Email Protocol: IMAP
  • IMAP Server: mail.mboxlogin.com
  • IMAP Port: 143
  • Connection Security: TLS/STARTTLS
  • Username: the email address you are checking
  • Username: The email address you are checking, e.g. example@somesite.com
  • Password: The password for this specific email account.

Incoming POP3 Protocol:

  • Email Protocol: POP3
  • POP3 Server: mail.mboxlogin.com
  • POP3 Port: 995
  • Connection Security: SSL
  • Username: The email address you are checking, e.g. example@somesite.com
  • Password: The password for this specific email account.


  • Email Protocol: POP3
  • POP3 Server: mail.mboxlogin.com
  • POP3 Port: 110
  • Connection Security: TLS/STARTTLS
  • Username: The email address you are checking, e.g. example@somesite.com
  • Password: The password for this specific email account.


Alternate Outgoing Settings:

  • SMTP server: mail.mboxlogin.com
  • SMTP port: 587
  • Connection Security: TLS/STARTTLS
  • Username: The email address you are checking, e.g. example@somesite.com
  • Password: The password for this specific email account.
  • This outgoing mail server does require authentication (this is an option in some email clients, which must be checked).


Go Back

If you would like to display a specific set of images in your Gallery, you can create a folder with those images and configure your Gallery to view this folder.
 

Creating a new Folder


If you already have uploaded the images that you would like to display in your Gallery, you can arrange them into a folder in the Photos and Media Manager. Simply click the "MEDIA" button in the main toolbar to open the Photos and Media manager and can create a new folder in the bottom left-hand side by clicking "Add New Folder". You can then drag and drop images into this folder (for more information on managing folders, please see the File Folders wiki).


Selecting a Folder to Display Images


If you would like to create a new folder and upload images from your computer, this can be managed from the Gallery. Simply navigate to your Gallery and click the cogwheel to see more menu options, from here go to "Images". Click "Upload Images" to select your folder from the drop-down menu or click "New Folder" to create a new one. In step 2, click the “Drop files to upload” region to upload files from your computer, or you can simply drag and drop files into this region.


Go Back

File Folders

File folders can be used to help keep your uploaded files organized. You can add files to multiple folders if necessary and files can be added or removed from folders at any time.


Where To Find


This area can be found in the "MEDIA" area on the Main Toolbar. File folder management options will be listed in the Manage Folders tab or on the left-hand side of the "Photo and Media Manager" screen.


Creating A New Folder


You can create a new folder in two places. From the Manage Folders tab creating a new folder can be done quickly by entering a folder name and clicking on the "Create Folder" button. 

From the left-hand side of the Photo and Media Manager screen click the "Create a New Folder" button, enter a folder name and click Add.


Adding Files To A Folder
 

Individual Files

To add an uploaded file to a folder, simply click and drag the file on top of the folder you wish to place it in.


Multiple Files:

To add multiple files to a folder, simply click each file listed in the main file area while holding the ctrl key (on a PC) or the command key (on a Mac), dragging to the folder when ready. 


The above image is an example of the appearance of multiple file selection. Note the count of selected files and the ability to remove them from the folder at the bottom of the image, and the highlighted current folder for these files.


Removing Files From A Folder
 

To remove a file or files from a collection, simply click on the file (or files using the method described above) listed in the folder and click the Remove Selected button. It will then revert to the Unsorted categorization or you can drag them to a different folder.


Editing and Deleting a Folder

  • Under the Manage Folders tab, clicking the Edit button will allow you to change the folder name.
  • You can create a new folder by clicking on the "Create Folder" button.
  • Clicking the folder name will allow you to view all files within that folder.
  • Clicking on the button will allow you to delete that folder.

Note: Deleting a folder will not delete the files within it. As a folder is only a means of grouping files, only the group is deleted in this process.


Go Back

Where to Find
 

You can view, upload and manage your files from the Photos and Media Manager. To access the Photos and Media Manager simply click the “MEDIA” option in the main toolbar.


Note: We do not support the upload of .exe or .svg files at this time.


Uploading Files
 

Uploading a file is a quick process. Simply click the “Upload New Files” button in the top right corner of the Photos and Media Manager. You can use this area to upload any type of file you want to share with your website visitors.


You can upload files from your computer or by using our stock photo library by navigating the following tabs:

 
1. Your Uploaded Files
 
Select the folder you wish to upload your file(s) to. If this is left unselected, files will go to the default unsorted categorization.

Drag and drop or click the upload screen to upload files from your computer. 


2. Stock Photo Library
 
Browse and search through our extensive stock photo library
Click on a photo to upload to your website and then click “Add To My Uploaded Files” to complete 

Note: You can upload files with spaces in the file name, however, these will be converted to dashes (-) after uploading. This helps avoid potential problems with URLs.


You can continue to add files in this manner until you are ready to upload them to your account. Files are not added to file folders by default, however, you can select the folder you would like to upload to using the Add to Folder drop-down box prior to uploading.
 
You can also drag and drop files into the Photos and Media Manager, or by clicking in the drag and drop region, this will allow you to browse files you have locally on your computer to be uploaded.
 

Note: Files can be removed from the list of files to be uploaded at any time by clicking the button beside the file.
 
You will return to the main file manager with a list of your uploaded files. These files are now ready for use on your website!


3. Managing your Folders
For further information on how to manage your folders within the Photos and Media Manager, please see our wiki article on File Folders.

4. Selecting an Image

There are many places found throughout the SiteBlocks editor, where you will be given the option to select an image for a background, an element, or a content container. You will be given the option to select an image from the File Manager, choose a Stock Image, or upload an image. These options will appear in a toolbar similar to the one below. Each option will bring you to our File Manager where you can find the desired image to add to your page.


Go Back

Hostname Mapping


Hostname Mapping allows you to map any external domain names or subdomains to your website and use them in addition to your website builder address.

Your primary hostname is the address that will display in your browser's address bar upon visiting your site. If you configure a domain to be used as a hostname (an option with paid packages) and want it to display as your website address at all times, simply set it as the primary hostname!


Adding An External Domain To Your Website


In your account dashboard, find the website you wish to add your external domain to. Click on the ellipses icon, where a menu will appear. Choose "Domains", this page should list your current domains attached to the website. Click "Add External Domain" add your domain and click "Add Domain". You have successfully added your external domain.

Go Back

Adding A New Page To Your Website


To create a new page for your website, simply go to the left side menu, where you will see "PAGES". You should see the list of all the current pages that are on your website. From here you can add a new page to your site, by selecting "Add New Page". Give your new page a name, save your changes by clicking "Create Page" and you're done.


Editing Page Content


To make any changes to your existing website pages, go to the 'PAGES' menu in your editor menu. From here you can click to visit the page to edit existing content. Any changes you make to the page will appear as soon as you make them. 


Page Settings (Rename a page, or manage page SEO)


To change the names of your pages to match your desired website, simply go to the left side menu, where you will see "PAGES". You should see the list of all the current pages that are on your website. From here you can add a new page to your site, or hover over one of your pages until you see a cogwheel icon, move your cursor over the icon, and choose "Settings". A new window will open, allowing you to rename the page that you clicked on. Save your changes and you're done.


Copying a Page


You can create a new page by creating a copy of an existing page. This is a great method to quickly create a new page if you like the design of a previous page and only need to change a few details. To create a page from a copy, go to "PAGES", then click the cogwheel icon next to the page you wish to duplicate, and click on the "Copy" option from the submenu. You will then be brought to a menu where you can give your page a new name and edit the page URL if you wish. Once you click "Create", you will be brought to your new duplicated page.


Deleting a Page


You can permanently delete a page by visiting the 'PAGES' option in the left side menu. From here, simply visit the cogwheel icon and click 'Delete', and then confirm. Please note that this action is not reversible so make sure you are sure you wish to delete the page before doing so.


If you wish to temporarily hide a page instead, you can unpublish the page from the 'PAGES' menu, then go to 'Settings' to open the page settings. Uncheck the 'Publish Page' and 'Add to Main Menu' checkboxes to hide the page from your visitors. The page will still be accessible to you when logged into the editor from the PAGES menu.


Go Back

Stock Photos

Adding A Stock Photo To Your Page


To add a stock photo to your page, choose your desired block that includes a photo, or add the image element to your website. Double click on the default image and a menu will pop up choosing where you would like to find your image. Choose Stock Photo Library, where it will bring up the stock photo tool where you may search for your desired open-sourced stock photo. Click on your desired image, and choose "use this image". 


You will now be taken to the photo editing tool, where you may make any desired changes. Once you are happy with your changes, select Insert Image. Your photo should have loaded into your web page.


Adding A Stock Photo To Your Library


You can save a stock photo to your library for later. To get started, simply go to "MEDIA" found in the Main Toolbar to open the Photos and Media Manager. Then you can browse and select a stock photo from the Stock Photo Library tab.


Go Back

18 blog posts