Menu

Welcome to the SiteBlocks Site Builder

HELP CENTER

Blog posts : "Elements"

Spacer Element


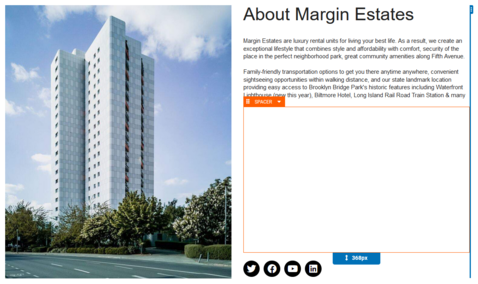
A Spacer Element is a great way to style your website. Adding space between content can sometimes help organize content and helps avoid having a crowded or busy-looking page. 


Tip: When you hover your mouse over the Spacer Element, arrows located at the bottom of the Element will appear that you can click and drag to adjust the height.


Where to Find


This Element can be found in the "ELEMENT" section of the Toolbar.


Adding to Website


After selecting this Element, you will be able to choose exactly where you want to add it! Simply drag the Spacer Element to any blue, orange, or purple ribbons that will appear when dragging the Element onto your page.


Options


You can optionally "Pin" the spacer to multiple pages to add consistency to the style of your website. Simply select the "Pin" option in your Element's toolbar

To quickly add another Spacer Element, select the "Duplicate" option in the Element's toolbar.


Go Back

Custom Code Element


A Custom Code Element is used for adding custom lines of HTML or JavaScript code to your website. This element is great if you want to insert code given to you by another website, or if you just want to write some custom HTML or JavaScript.


Where to Find


This Element can be found in the "ELEMENT" section of the Toolbar.


Adding to Website


After selecting this Element, you will be able to choose exactly where you want to add it!


Adding or Editing your Custom Code


You can access the settings for this Element again by clicking on the "Edit" button on the Element Toolbar. Remember to click "Save Changes" to save your code.


Go Back

Title Element

A custom element used for creating visually appealing and highly customizable Titles for your page, paragraphs, images, or any other content!


Where to Find


This element can be found in the "ELEMENTS" section of the Toolbar listed under Content.


Adding to your Website


You will see all available content locations it can be added to - on the current page only (content locations indicated by the blue, orange, or purple ribbons). 


Adding Icons to your Title


In the Element Toolbar, select "Add Icon" to add an icon. This will open the Title Icon Editor where you can click "Add an Icon" to select from our extensive list of icons. Change the color of the icon with the color picker and resize it to your preference using the slider, you can see a live preview of how this will appear on your page. Afterward, simply click "Save" to confirm your change.


Note: If you already have an icon added to your title, you can delete the icon by accessing the Title Icon Editor through the "Edit an Icon" option in the Element's Toolbar and then clicking the Trash Icon next to it. By default, this icon will be to the left of your Title, you can also move it to the right of your title by clicking on the line adjustment icon in the Title Icon Editor.


Styling your Title


You can customize the look of your Title in many different ways. If you would like to apply a style to all of your titles site-wide, select the "DESIGN" option in the main toolbar and then "Heading / Title Styles" to open Sitewide Heading Styles. Select the tab corresponding to your Title Element's heading size (H1 to H6). If you are not sure what heading size your Title is, a bubble beside your Title Element will appear with the heading size (H1 to H6) while the Sitewide Heading Styles window is open. By default, this Title is H2 for most templates. Customize your title to your liking and click "Save" to confirm any changes sitewide.

If you are looking to make a quick change to the font or content of a specific Title Element on your page, simply click on the title to edit the title. A rich text edit toolbar will appear when you click on the title where you can adjust the font stylings. To customize the background, border, padding or margin of the specific Title Element, select the "Element Wrapper" option in the Element toolbar to open the Element Styles window.
Go Back

Paragraph Element

A custom element is used for text and/or images. It is for creating generic content blocks where you can place whatever content you wish.
 

Where to Find


This element can be found in the "ELEMENTS" section of the Toolbar listed under Content.


Adding to your Website


You will see all available content locations it can be added to the current page only (content locations in orange or purple). 


Editing your Paragraph


You can edit your paragraph by simply clicking on the paragraph in the Site Blocks builder. Customize your text, add links, images, and more by utilizing the built-in toolbar.
 

BraveAI Content Writer (beta) *new*


Note: This is for paid users only.

Use BraveAI (artificial intelligence) to write content for a paragraph on your website.

BraveAI is SiteBlock's most recent and exciting addition. Use BraveAI to create engaging and relevant content for your website. Whether you're looking for ideas for a new paragraph or improving existing content, BraveAI is here to simplify the process. Follow the instructions below to make the most of this new feature.

  How to Use BraveAI

1. Click on an existing paragraph you'd like to add content to.

2. When the paragraph toolbar opens, choose the 'BraveAI' () option to get started. The BraveAI Content Writer dialog will then appear.


Alternatively, you can open BraveAI from the Element's toolbar.


3. Enter a prompt into the input field at the bottom and click 'GO' to proceed.


At any time, while it’s generating text, you can click the 'STOP' button.


Tell it to 'Use text' shown or even select part of the text and then choose 'Use selected text'. It will then insert the content onto your page!


How to Write an Effective Prompt for BraveAI

Writing an effective prompt will ensure BraveAI generates accurate and helpful content for you. This section discusses some tips and examples to help you master writing AI prompts.

When writing AI prompts, it is important to consider adding the following elements:
  • Define the purpose
  • Indicate the length
  • Specify the topic
  • Indicate the tone and style
  • Provide key points and details you want added

For example, you can say, "Write two paragraphs about our small business. We are called Deja Brew and we are a Coffee Shop in Denver, Colorado. We provide coffee, tea, and specialty cold beverages. We are open for business Monday-Friday 7:30 am-3 pm and 10 am-2 pm on weekends."


You can even ask it to write follow-up text afterward and it will remember what was previously entered.
For example, you can say "I want you to elaborate on why it's important to visit us."


Perhaps you want it longer, say "Make it three paragraphs."


We encourage you to give BraveAI a try and experiment with different prompts to discover just how useful this new tool can be.


Revision History


You can revert back to an older revision by selecting the 'Revisions' option from the Element's toolbar. From here, select a revision timestamp and then 'Select Revision'.


Customize your Content by Editing HTML


Prefer to work with HTML to customize your image or content? No problem! Simply select the "Edit HTML" option from the Element's Toolbar.


Go Back

4 blog posts